

Imagine biting into a buttery, crumbly crust that practically dissolves on your tongue, followed by a silky, bright lemon filling that’s perfectly tangy and sweet. These easy lemon bars are the kind of dessert that disappears in minutes at any gathering. Best part? They come together with just a handful of pantry staples and zero fancy tools. One bowl for the crust, one for the filling—done!
Whether you’re a baking newbie or a pro looking for that “melt-in-your-mouth” magic, this recipe delivers every single time. The secret? Powdered sugar in the crust for extra tenderness and fresh lemon zest that makes the flavor pop.
Prep Time: 15 minutes Bake Time: 45 minutes Chill Time: 2 hours Total Time: About 3 hours (mostly hands-off) Servings: 16 perfect squares
Gluten Free Lemon Shortbread Bars
Ingredients You’ll Need
Buttery Shortbread Crust
- 1 cup (226g) unsalted butter, softened to room temperature
- ½ cup (60g) powdered sugar
- 2 cups (250g) all-purpose flour
- ¼ teaspoon salt
Silky Lemon Filling
- 4 large eggs
- 2 cups (400g) granulated sugar
- ⅓ cup fresh lemon juice (about 3–4 lemons—fresh is non-negotiable!)
- 2 tablespoons lemon zest (from 2 lemons)
- ½ cup (60g) all-purpose flour
- 1 teaspoon baking powder
- Extra powdered sugar for dusting
Step-by-Step Instructions (So Easy!)
- Preheat & Prep — Heat your oven to 350°F (175°C). Line a 9×13-inch baking pan with parchment paper, leaving some overhang so you can lift the bars out easily.
- Make the Melt-in-Your-Mouth Crust — In a large bowl, beat the softened butter and powdered sugar until creamy and fluffy (about 2 minutes). Add the flour and salt. Mix just until it looks crumbly—no overmixing! Press the mixture firmly and evenly into the bottom of your pan.
Easy Lemon Bars with Shortbread Crust – Savoring Italy
- First Bake — Pop it in the oven for 20–25 minutes until the edges are lightly golden. The crust should smell amazing!
- Whisk the Filling While the Crust Bakes — In the same bowl (less dishes!), whisk the eggs and sugar until smooth. Stir in the fresh lemon juice, zest, flour, and baking powder. It will be thin and bright yellow—that’s perfect.
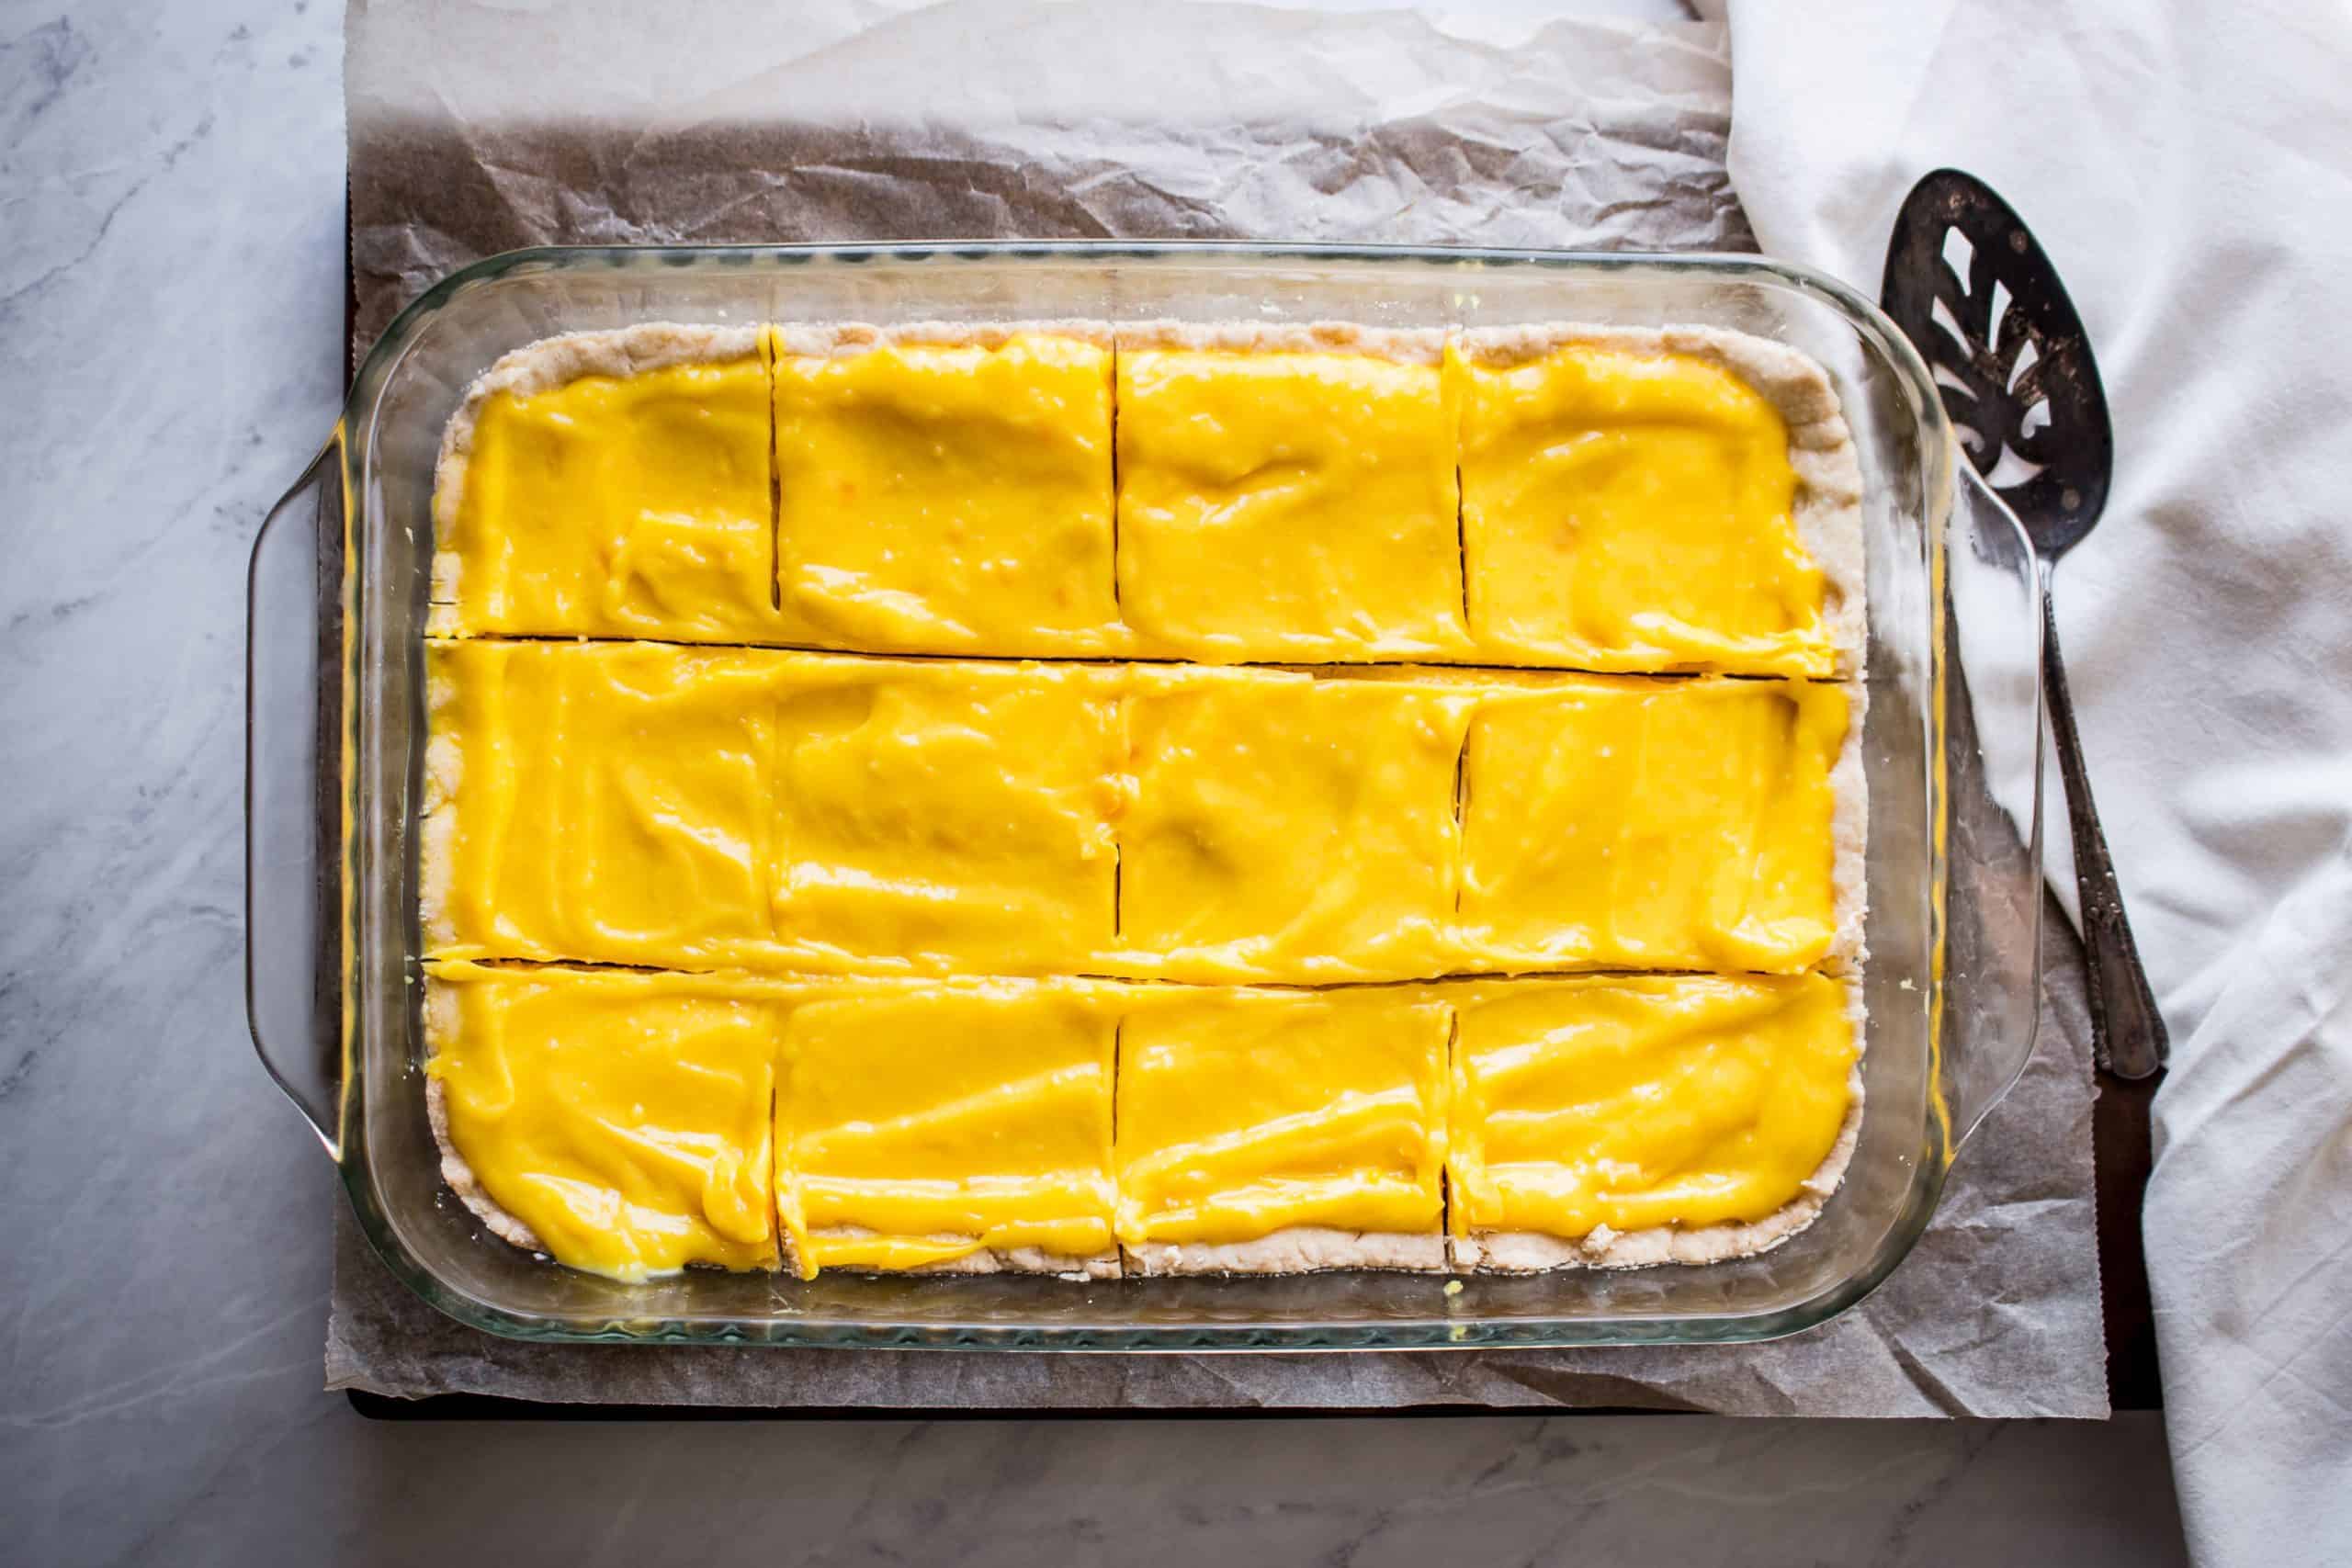
- Second Bake — Pour the filling over the hot crust and return to the oven for 20–25 minutes more. The center should look set but still have a tiny jiggle (like lemon curd). Overbaking = no melt-in-your-mouth texture!
- Cool & Chill — Let the pan cool completely on a wire rack (about 1 hour), then refrigerate for at least 2 hours. This step is what gives you those clean, bakery-style cuts.
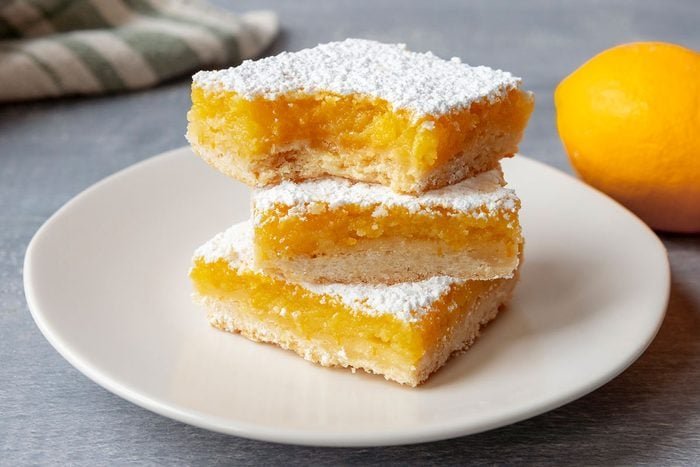
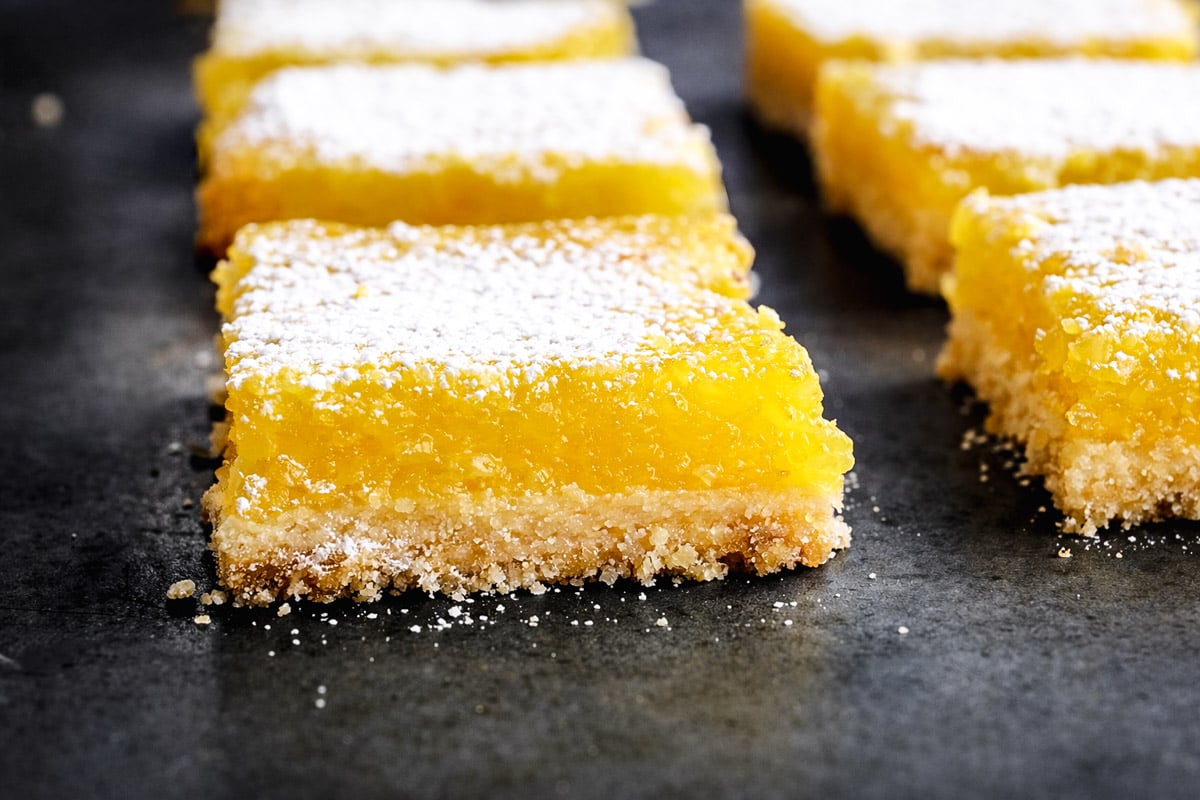
- Finish & Serve — Lift the bars out using the parchment, slice into 16 squares, and dust generously with powdered sugar right before serving.

Meyer Lemon Bars
Pro Tips for Lemon Bar Perfection
- Fresh lemons only — The bottled stuff just doesn’t deliver that bright, zesty punch.
- Room-temperature butter — Makes the crust extra tender and melt-in-your-mouth.
- Don’t skip the chill — Warm bars are delicious but messy. Cold bars = Instagram-worthy slices.
- Storage — Keep in an airtight container in the fridge up to 5 days (they actually taste even better the next day!). Freeze for up to 3 months.
- Clean cuts — Wipe your knife between slices and run it under hot water.
Fun Variations to Try
- Berry Lemon Bars — Scatter fresh raspberries or blueberries over the filling before the second bake.
- Lime Version — Swap lemons for limes for a key-lime twist.
- Gluten-Free — Use a 1:1 gluten-free flour blend (works like a charm).
These easy lemon bars are pure sunshine on a plate—tangy, sweet, and impossibly buttery. Your kitchen is about to smell like a bakery, and your friends will beg for the recipe!
Pin this now so you never lose it, then tag me when you bake them—I want to see your gorgeous bars!
