

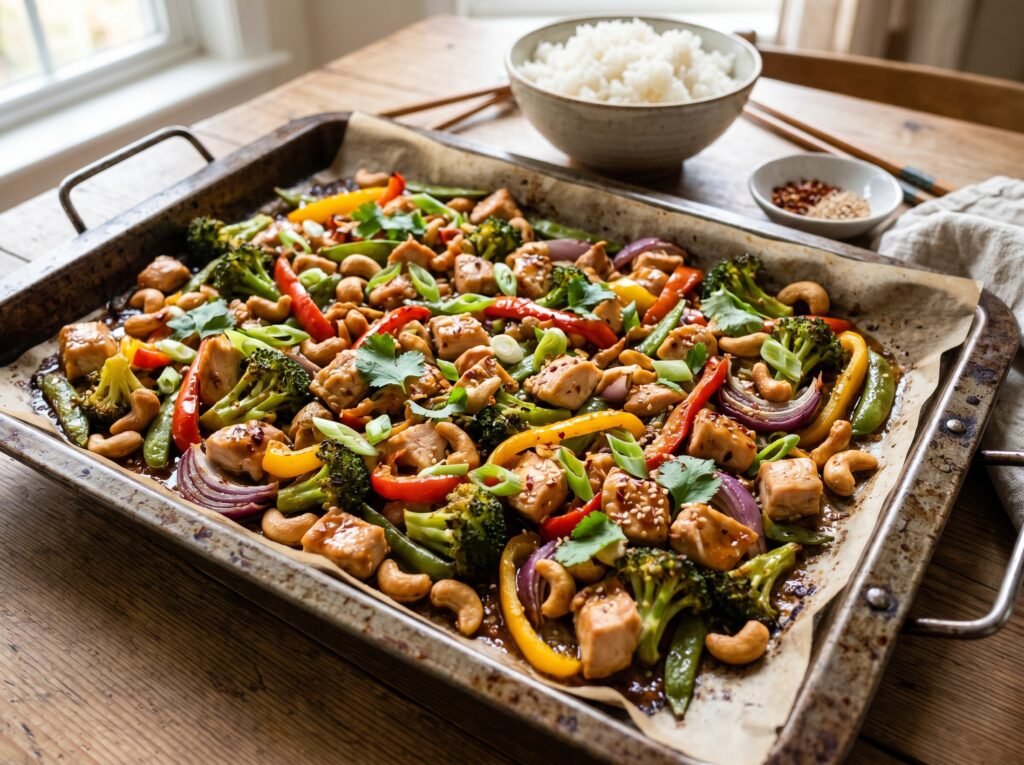
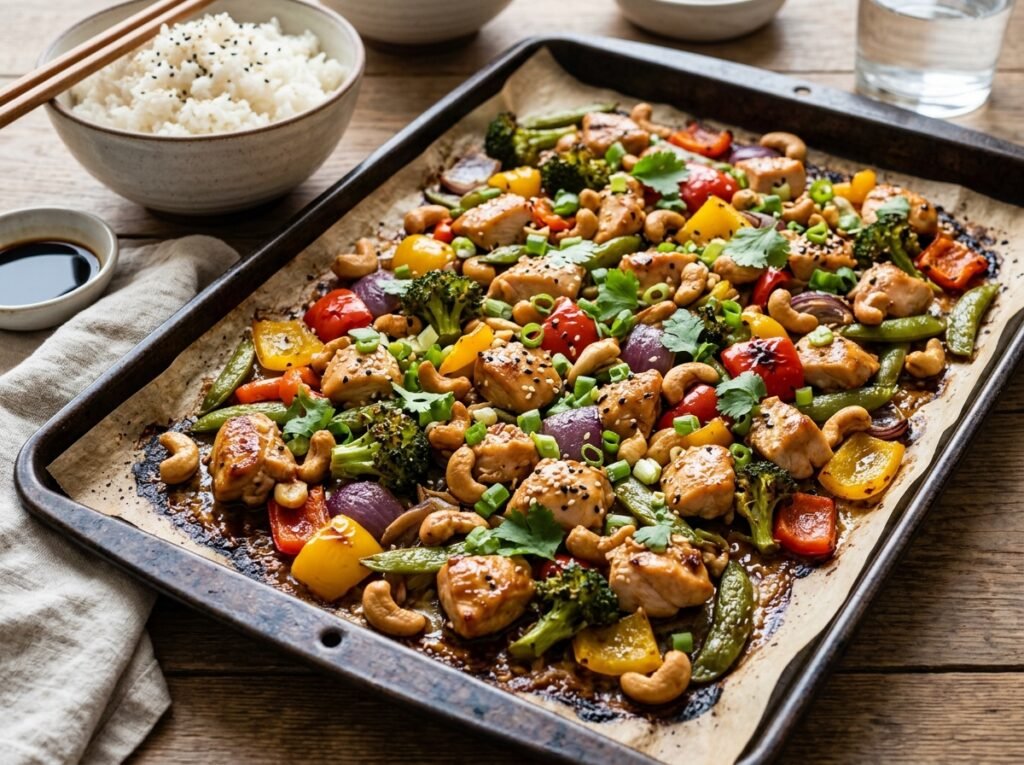
Classic Chinese takeout cashew chicken is traditionally cooked over intense heat in a blazing-hot wok. It’s a beautifully balanced dish—glossy, savory-sweet brown sauce coating velveted chicken, crisp bell peppers, and buttery, toasted cashews. Trying to replicate this on a standard home stovetop often results in a crowded, lukewarm pan where the chicken steams instead of sears, and the vegetables turn soggy. This Sheet Pan Cashew Chicken resolves that issue by spreading everything out flat on a hot metal tray, letting the intense convective heat of your oven mimic a wok’s high-heat sear with zero stovetop splattering.
The primary culinary obstacle when translating a stir-fry to a baking sheet is preventing the delicate sauce from burning and smoking before the raw chicken cooks through. Stir-fry sauces contain honey, hoisin, and soy sauce—all loaded with sugars that scorch easily. Our workaround is a two-stage sauce strategy paired with high-temperature roasting. We toss the chicken and vegetables in just a fraction of the sauce mixed with a high-smoke-point oil to roast at 220°C (425°F). This flash-cooks the chicken and blisters the peppers. The remaining sauce is kept cold and poured over the hot tray the second it exits the oven, instantly thickening into a glossy, velvety lacquer using the pan’s residual heat.
Why You’ll Love This Method
- Flawless Wok-Free Searing: Spacing the ingredients out on a large tray ensures they roast and caramelize at high heat rather than crowding together and steaming in their own juices.
- The Crispy Cashew Upgrade: Tossing raw or roasted cashews onto the hot pan during the final few minutes of baking releases their natural oils, making them incredibly fragrant, buttery, and exceptionally crunchy.
- Velvety “Velveted” Texture: Tossing the raw chicken chunks in a tiny bit of cornstarch before roasting mimics the traditional Chinese “velveting” technique, locking in juices so the breast meat stays completely tender.
- True One-Pan Clean-Up: No sticky woks to scrub, no oil droplets coating your stove. Everything—including the sauce thickening—happens right on the foil-lined baking sheet.
Key Ingredients Overview
- Boneless, Skinless Chicken Breasts or Thighs: Cut into uniform 1-inch bite-sized cubes. Chicken thighs are highly forgiving and stay ultra-juicy at high heat, though chicken breasts work beautifully if you monitor the cook time closely.
- The Umami Base Sauce: A rich blend of hoisin sauce, low-sodium soy sauce, rice vinegar, honey, sesame oil, and minced garlic and ginger. This provides that iconic sweet, savory, and tangy takeout profile.
- Bell Peppers & Onions: Red and green bell peppers cut into 1-inch squares match the size of the chicken perfectly, ensuring they develop beautiful blistered edges while retaining a satisfying crisp-tender snap.
- Raw or Toasted Cashews: Unsalted whole cashews are best. They absorb the savory sauce flavors while roasting on the pan, creating a rich contrast to the tender chicken.
Step-by-Step Instructions
1.The High-Heat Oven Blast:3 min.
Preheat your oven to 220°C (425°F). Line a large, rimmed baking sheet with heavy-duty aluminum foil. Spray the foil lightly with a neutral cooking oil spray to guarantee the chicken doesn’t stick.
2.The Stir-Fry Sauce Emulsion:4 min.
In a medium bowl, whisk together the hoisin sauce, low-sodium soy sauce, honey, rice vinegar, toasted sesame oil, minced garlic, and grated fresh ginger. Crucial step: Divide the sauce. Set half aside in a small bowl to use as your final fresh glaze.
3.The Cornstarch Velveting Toss:4 min.
Pat your chicken cubes completely dry with paper towels. Place them in a large bowl, sprinkle with the cornstarch, and toss until a thin white coating covers the meat. This starch barrier locks in moisture and helps the sauce cling to the meat.
4.The Initial Tray Assembly:3 min.
Add the square-cut bell peppers and onions to the bowl with the chicken. Pour the first half of your prepared stir-fry sauce over them, along with 1 tablespoon of neutral oil. Toss thoroughly to coat, then spread everything out into a completely flat, single layer on your sheet pan.
5.The High-Heat Flash Roast:12 min.
Slide the sheet pan into the upper third of your oven and roast for 12 minutes. The chicken will cook through rapidly and the edges of the peppers will begin to char slightly.
6.The Cashew Crunch Finish:3 min.
Carefully pull the hot tray out. Scatter your whole cashews evenly into the spaces around the chicken and peppers. Give everything a quick toss with a spatula, then return the pan to the oven for an additional 3 minutes to toast the cashews until golden-brown and aromatic.
7.The Residual Heat Glaze:1 min.
Remove the tray from the oven. Immediately pour the reserved second half of the cold sauce over the hot chicken and vegetables. Toss vigorously right on the pan; the heat of the metal will bubble and thicken the sauce instantly into a glossy coat. Garnish with sliced green onions and serve.
Expert Tips for Success
- Do Not Crowd the Pan: If your chicken chunks and vegetable squares are piled on top of each other, they will release water and boil instead of roasting. Use a large half-sheet pan (13×18 inches). If your pan is small, split the ingredients across two separate trays to ensure a proper sear.
- The Power of the Cornstarch Coating: Skipping the cornstarch means your chicken will shed its juices onto the pan, making the tray watery and preventing browning. The cornstarch acts like an invisible sponge, keeping the juices inside the chicken cubes where they belong.
- Add the Cashews Late: Cashews contain delicate fats that can burn quickly under a 220°C broiler or oven element. Adding them during the final 3 minutes of cooking gives them just enough time to heat through, release their buttery oils, and turn golden without crossing into bitter, over-toasted territory.
The Recipe Card
- Prep Time: 15 mins
- Cook Time: 15 mins
- Total Time: 30 mins
- Yield: 4 Takeout-Style Servings
Ingredients:
- 600g (1.3 lbs) Boneless, Skinless Chicken Thighs or Breasts (cut into 1-inch cubes)
- 1 tbsp Cornstarch
- 1 Large Red Bell Pepper (cut into 1-inch squares)
- 1 Large Green Bell Pepper (cut into 1-inch squares)
- 1 Medium Yellow Onion (cut into 1-inch squares)
- 100g (1 cup) Whole Cashews (unsalted, raw or roasted)
- 1 tbsp Neutral Cooking Oil (avocado, canola, or vegetable oil)
- 2 Green Onions (sliced, for garnish)
- The Takeout Sauce: 60ml (¼ cup) Hoisin Sauce, 3 tbsp Low-Sodium Soy Sauce, 2 tbsp Honey or Maple Syrup, 1 tbsp Rice Vinegar, 1 tbsp Toasted Sesame Oil, 3 cloves Garlic (minced), 1 tsp Fresh Ginger (finely grated).
Instructions:
Preheat oven to 220°C (425°F) and line a large baking sheet with foil. In a small bowl, whisk together all the takeout sauce ingredients until smooth; divide the sauce equally into two separate bowls. Toss the dry chicken cubes with the cornstarch in a large bowl until lightly coated. Add the peppers, onions, the first half of the sauce, and a tablespoon of neutral oil to the chicken, tossing to coat. Spread in a single layer on the sheet pan and roast for 12 minutes. Remove the pan, scatter the cashews across the tray, toss gently, and roast for 3 more minutes. Pull the pan from the oven, pour the remaining cold sauce over the hot ingredients, toss to glaze, garnish with green onions, and serve hot over rice.
