

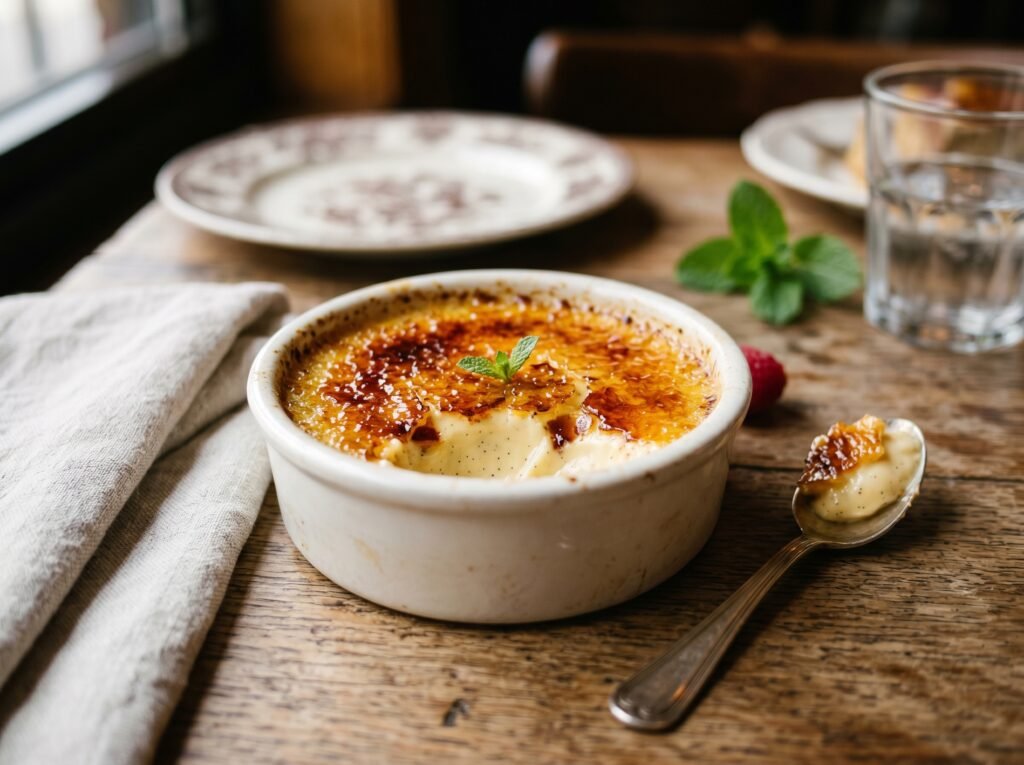
There is no sweet treat that captures the imagination of a dessert lover quite like a flawless Crème Brûlée. This absolute triumph of French pastry technique translates literally to “burnt cream,” and it delivers the ultimate study in contrasting textures. It features a perfectly level, ice-cold, velvet-smooth baked custard hidden beneath a brittle, glass-like sheet of deeply caramelized sugar. When you strike it with the back of a spoon, it should shatter cleanly with a sharp snap, allowing you to plunge into the cold, intensely creamy vanilla heart beneath. If your homemade crème brûlées end up curdled, watery, or have a soft, sticky sugar lid, it comes down to protein coagulation temperatures and sucrose melting mechanics.
The magic of a bakery-grade crème brûlée relies on Low-Temperature Bain-Marie Egg Gelatinization. Egg yolks and heavy cream form a delicate emulsion that is incredibly sensitive to direct heat. If cooked too quickly or at a high temperature, the egg proteins will lock together tightly, squeezing out their moisture and turning your silky custard into a watery, scrambled-egg mess. By baking the ramekins inside a bain-marie (hot water bath), the water absorbs the harsh oven heat and caps the temperature around the ceramic at a gentle 100°C (212°F). This allows the yolks to slowly unfold and trap the cream into a rich, wobble-set gel that remains completely smooth and luxurious.
Why You’ll Love This Method
- The Perfect Velvet Textural Contrast: The transition from a fiery, hot, shatteringly crisp sugar glaze to a cool, melt-in-your-mouth custard cream is pure dessert perfection.
- Intense, Unadulterated Vanilla Profile: Steeping a real, split vanilla bean pod directly into the warm cream extracts thousands of aromatic flecks that sink beautifully to the base of the dish.
- The Ultimate Make-Ahead Marvel: You can bake, cool, and chill the custards in the refrigerator up to three days in advance, leaving just the spectacular torching step for the moment your guests sit down.
- Clean, Pure-Yolk Richness: Bypassing egg whites completely ensures the filling has an extraordinarily luxurious, buttery mouthfeel without any sulfurous or rubbery undertones.
Key Ingredients Overview
- A Whole Plump Vanilla Bean: Do not swap this out for standard imitation vanilla extract. A real vanilla pod provides a deeply complex, woody, floral aroma and those signature tiny black seeds that prove a dessert is made from scratch.
- Heavy Whipping Cream (36% to 40% Fat): The high fat content is mandatory. It wraps around the egg proteins, protecting them from curdling and ensuring the final custard has a thick, spoonable texture rather than running like milk.
- Large Egg Yolks: Egg yolks act as the primary thickening agent. Their natural lecithin emulsifies the fats and water in the cream, setting the mixture into a delicate, uniform gel when baked.
- Superfine (Caster) White Sugar: For the critical top layer, superfine sugar is far superior to regular granulated sugar. The tiny crystals melt incredibly fast under a flame, caramelizing evenly into a thin, uniform glass window before the underlying custard can heat up and melt.
Step-by-Step Instructions
1.The Vanilla Bean Cream Steep:10 min.
Preheat your oven to 165°C (325°F). Place your heavy whipping cream and granulated white sugar into a saucepan. Use a sharp paring knife to slice your whole vanilla bean pod open lengthwise, scrape out the thousands of tiny black seeds with the back of the knife, and drop both the seeds and the empty pod directly into the cream. Place over medium heat until it just begins to simmer around the edges, then remove from heat, cover with a lid, and let it steep for 10 minutes.
2.The Gentle Yolk Emulsion Tempered Whisk:3 min.
In a medium bowl, whisk your large egg yolks together just until smooth and fluid. Do not whip them vigorously—you want to avoid creating any froth or air bubbles, which will translate into an unsightly, porous texture inside your baked custard.
3.The Slow Stream Liaison Warmup:3 min.
Remove the spent vanilla bean pod from your warm cream. While whisking the egg yolks continuously with one hand, slowly pour the warm vanilla cream into the yolks in a thin, steady stream. This process—called tempering—gradually warms up the yolks without shocking them or cooking them into scrambled bits.
4.The Velvet Sieve Velvet Strain:2 min.
Pour your assembled custard mixture through a fine-mesh sieve into a large liquid measuring cup with a pouring spout. Straining is non-negotiable; it catches any tiny bits of egg or coagulated protein, ensuring an absolutely flawless, mirror-smooth texture.
5.The Ramekin Bath Towel Alignment:2 min.
Line a large, deep metal baking pan with a clean paper towel or kitchen towel (this prevents the ramekins from sliding around and insulates them from direct bottom heat). Arrange four shallow 4-to-6-ounce ceramic ramekins on top of the towel. Divide the strained liquid custard evenly among the ramekins.
6.The Bain-Marie Gentle Hot Water Bake:35 min.
Carefully transfer the baking pan onto the middle rack of your preheated oven. Using a pitcher, carefully pour boiling hot water into the roasting pan around the ramekins, being careful not to splash any water into the custard. Fill the pan until the hot water reaches halfway up the outer sides of the ramekins. Bake at 165°C (325°F) for 30 to 35 minutes.
7.The Perfect Wobble Center Extraction:3 min.
Gently nudge a ramekin; the custards are done when the edges are completely set, but the exact center still gives a distinct, jelly-like wobble when shaken. Use tongs to carefully lift the ramekins out of the hot water bath and set them on a wire rack to cool to room temperature, then transfer to the refrigerator to chill for at least 3 hours (or overnight) until ice-cold.
8.The Fiery Sugar Glass Caramelization:3 min.
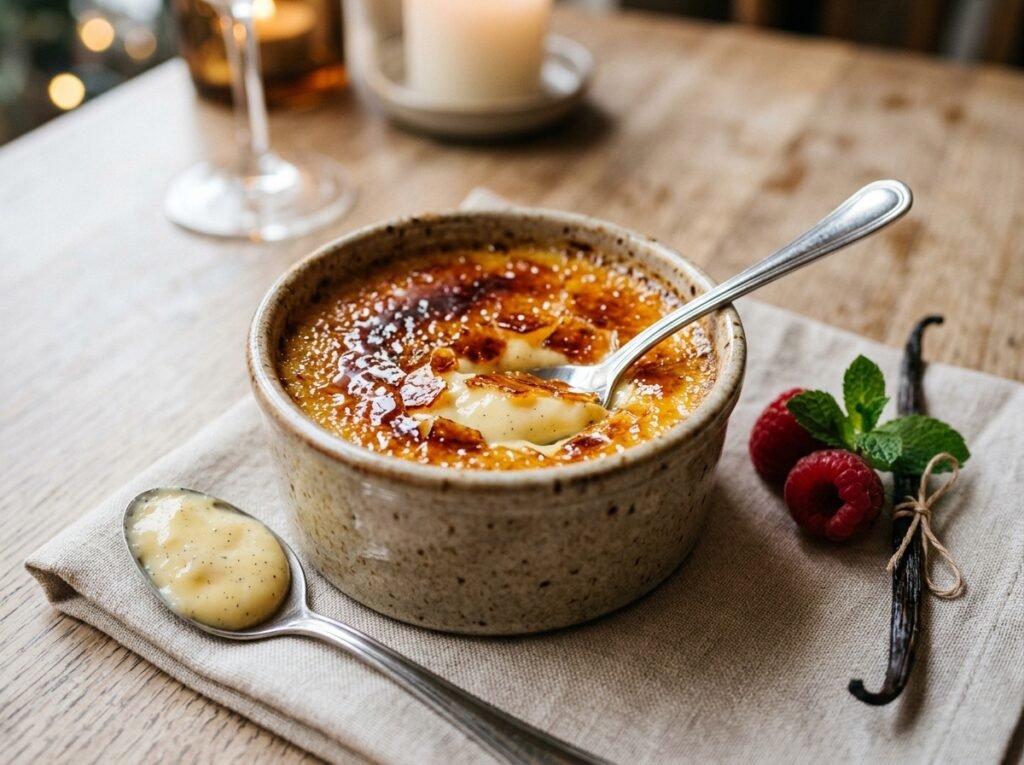
Right before serving, remove the cold ramekins from the fridge. If there is any condensation on the surface of the custard, gently blot it dry with a paper towel. Sprinkle exactly one teaspoon of superfine caster sugar evenly across the top of each custard, tilting the ramekin to distribute it perfectly. Ignite your kitchen blowtorch and sweep the flame in slow circles an inch above the sugar. Watch it bubble, liquefy, and turn into a deep, glossy amber glass crust. Let it sit undisturbed for 2 minutes to harden, then serve immediately.
Expert Tips for Success
- How to Pop Surface Air Bubbles: If you notice small air bubbles floating on top of your custards after pouring them into the ramekins, do not bake them immediately! Those bubbles will bake into a bumpy, dry skin. To fix this, quickly pass the flame of your kitchen blowtorch lightly across the surface of the raw liquid custard; the heat will instantly pop every single bubble, leaving a smooth surface.
- The Dual-Layer Torching Trick: For the ultimate professional, perfectly flat sugar crust that is thin enough to snap easily but thick enough to cover the entire dish, use the dual-layer method. Sprinkle half a teaspoon of sugar on the custard, torch it until it just melts and turns pale gold, let it cool for 30 seconds, then sprinkle another half teaspoon of sugar on top and torch it a second time until a deep caramel amber.
- Never Blowtorch Ahead of Time: A crème brûlée sugar crust is highly hydroscopic. If you torch the sugar crust and place the dish back into the refrigerator to serve later, the sugar will draw out the moisture from the cold custard below and turn into a soft, sticky, weeping liquid soup within an hour. Always flame the top right before it hits the table!
The Recipe Card
- Prep Time: 15 mins
- Cook Time: 35 mins
- Chilling Time: 3 hrs
- Total Time: 3 hrs 50 mins
- Yield: 4 Elegant Shallow Ramekins
Ingredients:
- The Velvet Vanilla Cream: 480ml (2 cups) Heavy Whipping Cream (36%+ fat content), 50g (¼ cup) Granulated White Sugar, 1 Whole Plump Vanilla Bean Pod (or 2 tsp premium vanilla bean paste), 5 Large Egg Yolks (room temperature), Pinch of Fine Sea Salt.
- The Glass Topping: 4 to 6 tsp Superfine Caster White Sugar (one teaspoon per ramekin for torching).
Instructions:
Preheat your oven to 165°C (325°F). In a saucepan, combine heavy cream, granulated sugar, and salt. Slice the vanilla bean open, scrape the seeds into the cream, drop the empty pod in, and bring to a bare simmer over medium heat. Remove from heat, cover, and steep for 10 minutes. In a medium bowl, whisk the egg yolks gently until fluid. Remove the vanilla pod from the cream, then slowly pour the warm cream into the egg yolks in a thin stream while whisking continuously to temper. Strain the mixture through a fine sieve into a pouring jug. Place a paper towel in the bottom of a roasting pan, arrange 4 shallow ramekins on top, and fill them with the custard. Put the pan in the oven, then pour boiling water into the pan until it reaches halfway up the sides of the ramekins. Bake for 30-35 minutes until the edges are set but the center still wobbles like jelly. Remove from the water bath, cool to room temperature, then chill in the fridge for at least 3 hours. Before serving, blot surface moisture with a paper towel, sprinkle 1 teaspoon of caster sugar evenly over each dish, and torch until deeply caramelized and bubbling. Let set for 2 minutes before serving.
