

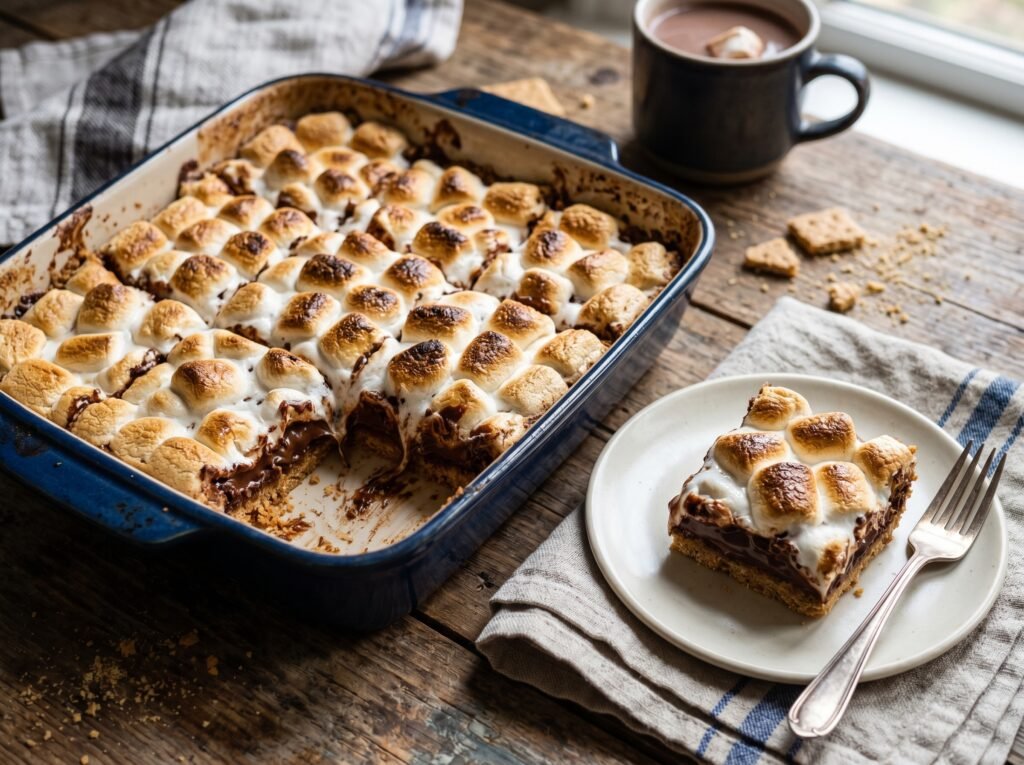
You don’t need a roaring backyard campfire to experience the nostalgic magic of a classic summer s’more. These gourmet S’mores Bars take all the legendary components of the traditional campfire sweet treat—the crisp, honey-sweet crunch of graham crackers, a thick, rich layer of melted milk chocolate, and a pillowy, golden-brown toasted marshmallow crown—and packs them into an effortless, crowd-pleasing sheet pan dessert. If your homemade s’mores bars consistently turn into a crumbly mess that falls apart when sliced, dry out into a hard cookie block, or end up with a layer of tough, rubbery marshmallow, it all comes down to gelatin melting kinetics and targeted starch moisture absorption.
The secret to a pristine, bakery-grade s’mores bar relies on the Dual-Phased Starch Cushion and Sugar Inversion Strategy. Traditional marshmallows are held together by a tight network of gelatin proteins. If you bake them for too long under intense oven heat, the gelatin dries out and over-coagulates, turning tough, stringy, and incredibly rubbery instead of melting down smoothly. By building a thick, soft graham-shortbread cookie dough base rather than a loose, dry butter-crumb crust, you create a soft starch cushion that absorbs the moisture from the chocolate layer. When baked, the chocolate melts completely into a glossy, fluid pool, while the marshmallows are blasted under a quick, high-heat broiler setting, liquefying the sugary interiors into a gooey cream while charring the tops to a smoky, toasted perfection.
Why You’ll Love This Sweet Treat
- The Absolute Campfire Nostalgia: It delivers that distinct, smoky-sweet chocolate and marshmallow combo without dealing with smoke, firewood, or outdoor bugs.
- A Sturdy, Sliceable Graham Base: Unlike standard crumb crusts that fall apart, this dough uses egg and flour to create a tender, buttery base that holds its shape cleanly.
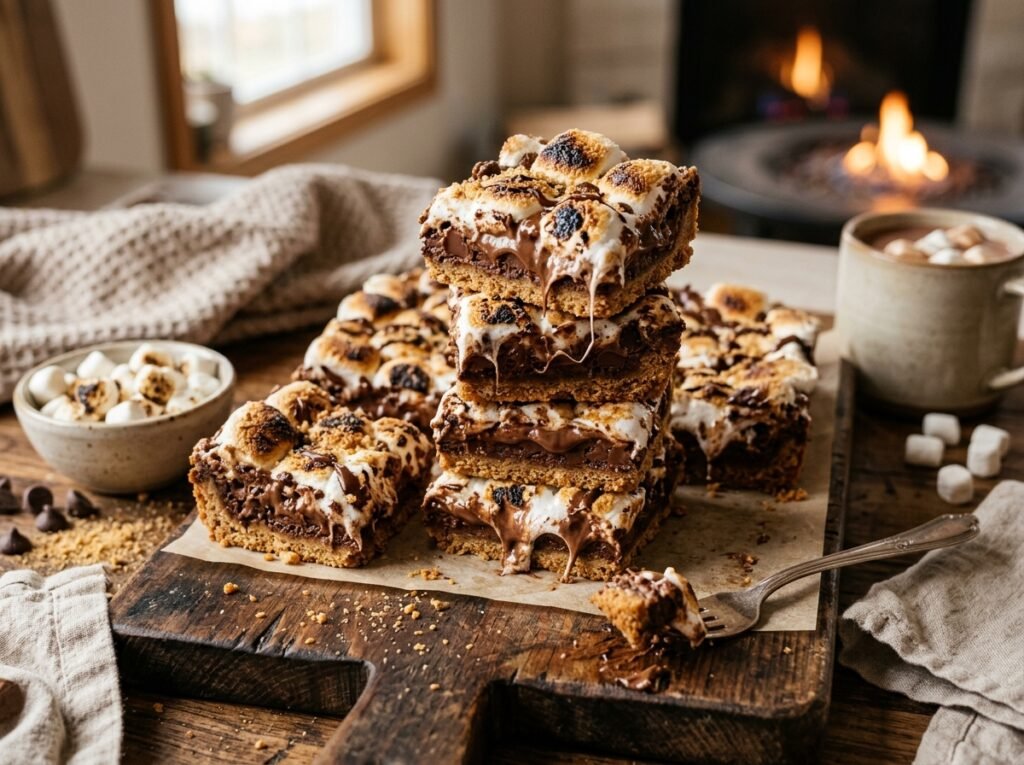
- Gooey, Stretchy Texture Drama: Slicing into these bars reveals an incredible, elastic marshmallow-pull that makes them a sensational visual experience.
- The Ultimate Sheet Pan Efficiency: Perfect for packing into a digital culinary content feed or a Pinterest-ready board, you can feed a whole crowd with a single baking sheet.
Key Ingredients Overview
- Finely Ground Graham Cracker Crumbs: Pulverizing honey graham crackers into a fine dust and mixing it directly with flour introduces a deep, nutty, molasses-sweet flavor profile to the cookie base.
- Light Brown White Sugar Blend: Using brown sugar in the shortbread dough introduces natural moisture and a hint of caramel notes, keeping the cookie crust perfectly soft and chewy under the chocolate layer.
- High-Quality Milk Chocolate Baking Bars: While dark chocolate is delicious, classic s’mores rely on the creamy, sweet melting profile of milk chocolate. Real baking bars melt far more smoothly than standard chocolate chips, which contain starches that block a clean liquid pool.
- Fresh, Plump Jumbo Marshmallows: Fresh marshmallows contain a high level of moisture. Slicing them in half exposes their sticky, soft interiors directly to the heat, allowing them to fuse into a seamless, gooey blanket across the chocolate.
Step-by-Step Instructions
1.The Non-Stick Parchment Sling Alignment:5 min.
Preheat your oven to 175°C (350°F). Line an 8×8-inch square metal baking pan with a sheet of aluminum foil or parchment paper, leaving a 2-inch overhang on the sides to create a “sling” for lifting the bars out later. Lightly coat the paper with cooking spray.
2.The Graham Shortbread Sandy Crumble Dust:5 min.
Place your honey graham crackers into a food processor and pulse until they are broken down into a fine, sandy dust. In a medium bowl, vigorously whisk together the graham cracker crumbs, all-purpose flour, baking powder, and fine sea salt until uniform.
3.The Soft Butter Sugar Emulsion Cream:4 min.
In a large bowl (or stand mixer), combine your softened unsalted butter and light brown sugar. Beat on medium-high speed for 3 minutes until the mixture turns pale, light, and fluffy. Add your large egg and vanilla extract, beating for another 60 seconds until fully combined.
4.The Hand-Pressed Graham Base Foundation:2 min.
Turn your mixer to low speed and add the dry graham-flour mixture, mixing just until a soft, uniform cookie dough forms. Transfer exactly two-thirds of this soft dough into your prepared baking pan. Use your bare fingertips or the flat bottom of a measuring cup to press the dough firmly and evenly into the bottom of the pan.
5.The Initial Blind Structural Cookie Bake:20 min.
Slide the pan onto the center rack of your preheated oven. Bake at 175°C (350°F) for 18 to 20 minutes. Watch closely: the edges should look lightly golden-brown and the center should be set. Remove the pan from the oven, but leave the oven running.
6.The Solid Milk Chocolate Fusion Grid:2 min.
While the cookie base is hot straight out of the oven, immediately arrange your milk chocolate bars (or chocolate chips) in a tight, single layer across the entire surface of the crust. The residual heat from the base will instantly begin melting the cocoa butter fats, turning the chocolate into a glossy pool.
7.The Dough Shard and Marshmallow Blanket:3 min.
Take the remaining one-third of your raw graham dough and break it apart with your fingers, scattering rustic, flat cookie dough clumps loosely over the chocolate layer. Arrange your halved marshmallows cut-side down in tight, even rows over the top, covering the chocolate completely.
8.The Golden Marshmallow Expansion Bake:12 min.
Return the pan to the oven and bake at 175°C (350°F) for an extra 10 to 12 minutes. The marshmallows will puff up dramatically and turn a beautiful, light toasted-tan color, while the raw dough shards bake into crisp cookie crumbles.
9.The High-Heat Campfire Broiler Toast:2 min.
Turn your oven to the Broil setting on high for 1 to 2 minutes to get that authentic campfire finish. Watch the pan like a hawk! The marshmallows will quickly caramelize, developing deep golden-brown, blistered, and charred spots. Remove immediately and let cool completely in the pan for 1 hour to let the chocolate re-solidify before lifting the sling and slicing.
Expert Tips for Success
- The Clean Slice Hot Knife Trick: Cutting through warm, sticky marshmallows and melted chocolate can easily turn into an ugly, messy smear. To get pristine, sharp, bakery-style square borders, let the bars cool down completely to room temperature, then pop the pan into the fridge for 30 minutes to firm up the fats. Use a long, sharp chef’s knife, dip the blade into a glass of hot water, wipe it dry, and make one clean slice straight down. Wipe the blade clean and re-warm it between every single cut.
- Never Use Stale Marshmallows: Check the texture of your marshmallows before building the topping. If they have been sitting open in your pantry and feel stiff, dry, or powdery, do not use them! Stale marshmallows have lost their internal moisture, meaning they will melt into a tough, leathery, plastic-like sheet in the oven instead of a soft, stretchy, liquid cloud.
- Elevate with a Touch of Sea Salt: Because milk chocolate and marshmallows are both naturally high in sugar, these bars can lean toward being cloyingly sweet. To create a highly sophisticated, modern flavor profile, sprinkle a generous pinch of flaky sea salt (like Maldon) directly over the melted chocolate layer right before you blanket it with the marshmallows.
The Recipe Card
- Prep Time: 20 mins
- Cook Time: 32 mins
- Cooling Time: 1 hr
- Total Time: 1 hr 52 mins
- Yield: One 8×8-inch Pan (16 Decadent Square Bars)
Ingredients:
- The Graham Shortbread Crust: 150g (approx. 1 ¼ cups) Honey Graham Cracker Crumbs (about 10 full sheets), 130g (1 cup) All-Purpose Flour, 1 tsp Baking Powder, ¼ tsp Fine Sea Salt, 115g (½ cup) Unsalted Butter (softened to room temp), 100g (½ cup, packed) Light Brown Sugar, 1 Large Egg (room temperature), 1 tsp Pure Vanilla Extract.
- The Molten Center & Crown: 200g (7 oz) High-Quality Milk Chocolate Bars (broken into squares, or milk chocolate chips), 200g (approx. 3 cups) Fresh Large Marshmallows (cut completely in half horizontally), Flaky Sea Salt (optional garnish).
Instructions:
Preheat your oven to 175°C (350°F). Line an 8×8-inch square metal baking pan with parchment paper, leaving an overhang on the sides to use as a lift sling, and spray lightly with oil. In a medium bowl, whisk together the fine graham cracker crumbs, all-purpose flour, baking powder, and salt. In a separate large bowl, beat the softened butter and light brown sugar together on high speed for 3 minutes until fluffy. Add the egg and vanilla extract, beating until completely smooth. Turn the mixer to low and add the dry ingredients, mixing just until a soft cookie dough forms. Press exactly two-thirds of this dough evenly into the bottom of your prepared pan. Bake for 18-20 minutes until the edges are golden. Remove from the oven and immediately top the hot crust with a solid layer of milk chocolate pieces. Scatter the remaining raw dough in small clumps over the chocolate, then arrange the marshmallow halves cut-side down in tight rows over the top. Return to the oven and bake for 10-12 minutes until the marshmallows are puffed and soft. Turn the oven to broil for 1-2 minutes until the tops are beautifully charred and golden-brown. Cool completely in the pan for 1 hour before using the sling to lift, slice into squares, and serve.
