

If you have only ever eaten commercial marshmallows from a plastic grocery bag, you have yet to experience the true magic of this classic confection. A masterclass Homemade Marshmallow is an absolute revelation: it features a delicate, powdery outer dust that gives way to an impossibly light, cloud-soft, and pillowy interior that melts seamlessly on the tongue. Unlike mass-produced versions that can be tough and rubbery, homemade marshmallows are incredibly tender, stretchy, and carry a pure, clean vanilla aroma. If your homemade marshmallows consistently collapse into a sticky, weeping puddle, turn out dense and rubbery like shoe leather, or seize up before you can spread them into the pan, it all comes down to precision sucrose temperatures and gelatin hydration mechanics.
The scientific secret behind a flawless, bouncy marshmallow is the Triple-Phased Collagen Hydration and Sugar Inversion Strategy. Marshmallows are essentially a highly aerated, stabilized sugar foam. To achieve that signature bounce without density, unflavored gelatin (a purified collagen protein) must first be fully “bloomed” in cold water so its protein chains unwind. Next, a hot sugar syrup made of sucrose and light corn syrup is boiled to exactly $115^\circ\text{C}$ ($240^\circ\text{F}$)—the soft-ball stage. The corn syrup acts as an invert sugar, providing complex glucose molecules that physically block regular sugar from crystallizing into grainy particles. When this hot syrup is whipped into the gelatin, the unwound collagen strands trap millions of tiny micro-air bubbles, forming a tight, elastic web that locks in the moisture and sets into a perfect, spongy gel grid as it cools.
Why You’ll Love This Sweet Treat
- An Unmatched Cloud-Like Softness: Bypassing industrial cornstarches and preservatives yields an incredibly melting, velvety texture that store-bought bags simply cannot replicate.
- The Ultimate Hot Cocoa Companion: Because they lack heavy chemical stabilizers, these marshmallows melt beautifully into a glossy, rich cream top when dropped into hot chocolate.
- Infinite Flavor and Color Customization: This master recipe serves as a flawless blank canvas for adding bright pastel food colors, festive extracts, or fun holiday shapes.
- Stunning Visual Curation Asset: Slicing through a thick, snowy-white slab of homemade marshmallow creates a gorgeous, texture-heavy visual that is perfect for Pinterest grids and digital food curation.
Key Ingredients Overview
- Unflavored Powdered Gelatin: The structural backbone of the marshmallow. It creates the flexible, elastic protein walls required to hold the whipped air bubbles in place, providing that iconic squish and bounce.
- Light Corn Syrup: A vital texture stabilizer. It functions as an interfering agent that prevents the sucrose molecules from bonding back together into hard crystals, guaranteeing a silky-smooth, stretchy body.
- Granulated White Sugar: The primary sweetener that, when boiled with water to the soft-ball stage, provides the body and sticky volume needed to build the foam matrix.
- A 50/50 Coating of Powdered Sugar and Cornstarch: The ultimate non-stick armor. Marshmallow fluff is exceptionally sticky; tossing the cut cubes in this fine, moisture-absorbing dust seals the edges so they can be handled and stacked cleanly.
Step-by-Step Instructions
1.The Non-Stick Starch Armor Coating:5 min.
Lightly coat the bottom and sides of an 8×8-inch square metal baking pan with a neutral oil or cooking spray. In a small bowl, whisk together your powdered icing sugar and cornstarch. Dust the inside of the greased pan heavily with this powder mixture, tilting it to coat all surfaces completely. Tap the excess powder back into the bowl and save it for later.
2.The Cold Collagen Protein Bloom:10 min.
Fit your stand mixer with the whisk attachment. In the stainless steel mixer bowl, pour exactly 120ml (½ cup) of cold water. Sprinkle your unflavored powdered gelatin evenly across the surface of the water. Let it sit undisturbed for 10 minutes—the gelatin will absorb the water, swelling into a thick, wrinkled, rubbery mass. This is called “blooming.”
3.The Soft-Ball Precision Thermal Boil:12 min.
In a medium, heavy-bottomed saucepan, combine your granulated white sugar, light corn syrup, fine sea salt, and the remaining 120ml (½ cup) of water. Place over medium-high heat and clip a precise digital candy thermometer to the side of the pan. Bring to a boil, stirring gently just until the sugar dissolves. Once boiling, do not stir again. Let it bubble freely until the thermometer reads exactly 115°C (240°F).
4.The Slow-Pour Liquid Heat Liaison:3 min.
Turn your stand mixer to low speed to begin stirring the bloomed gelatin. Carefully remove the boiling sugar syrup from the stove. Moving slowly and cautiously, pour the hot syrup in a thin, steady stream down the inside wall of the mixer bowl directly into the gelatin. Pouring it down the side prevents the boiling sugar from hitting the whisk and splashing your skin.
5.The High-Speed Aerated Tripling Whip:12 min.
Once all the syrup is added, gradually increase the mixer speed to high. Whip the mixture on high for a full 10 to 12 minutes. Watch the dramatic evolution: the clear amber liquid will rapidly turn opaque, expanding into a thick, glossy, snowy-white marshmallow foam that triples in volume and pulls away from the sides of the bowl in heavy ribbons.
6.The Vanilla Aromatic Polishing Fold:1 min.
During the final 30 seconds of whipping, turn the mixer down to medium speed and pour in your pure vanilla extract. Let it mix just until the aromatic oils are completely incorporated into the thick, warm foam.
7.The Rapid Spatula Level Release:5 min.
Working quickly before the gelatin begins to cool and set, scrape the warm marshmallow fluff out of the mixing bowl and into your prepared baking pan using a greased flexible spatula. Smooth the top surface as flat and level as possible. Dust the top heavily with a layer of your reserved sugar-starch powder.
8.The Structural Crystalline Set Cure:6 hours.
Leave the marshmallow pan uncovered on the countertop at room temperature for at least 6 hours (preferably overnight). Do not refrigerate it! The cool, ambient air allows the gelatin network to finish cross-linking completely, setting the soft foam into a bouncy, sliceable sheet.
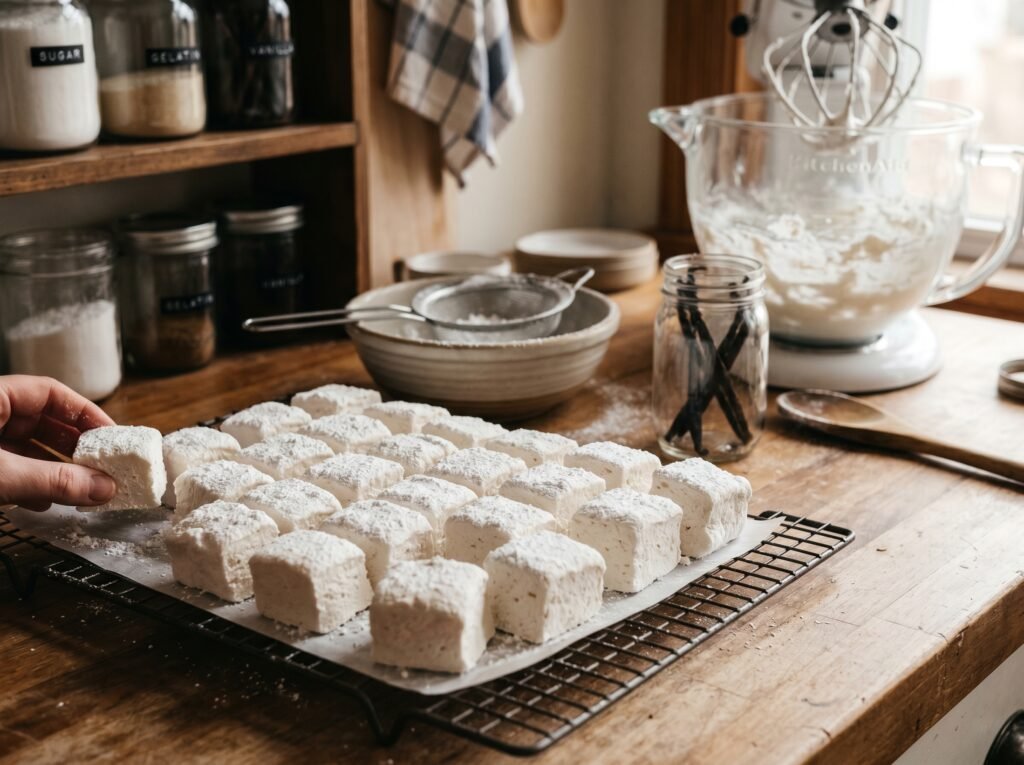
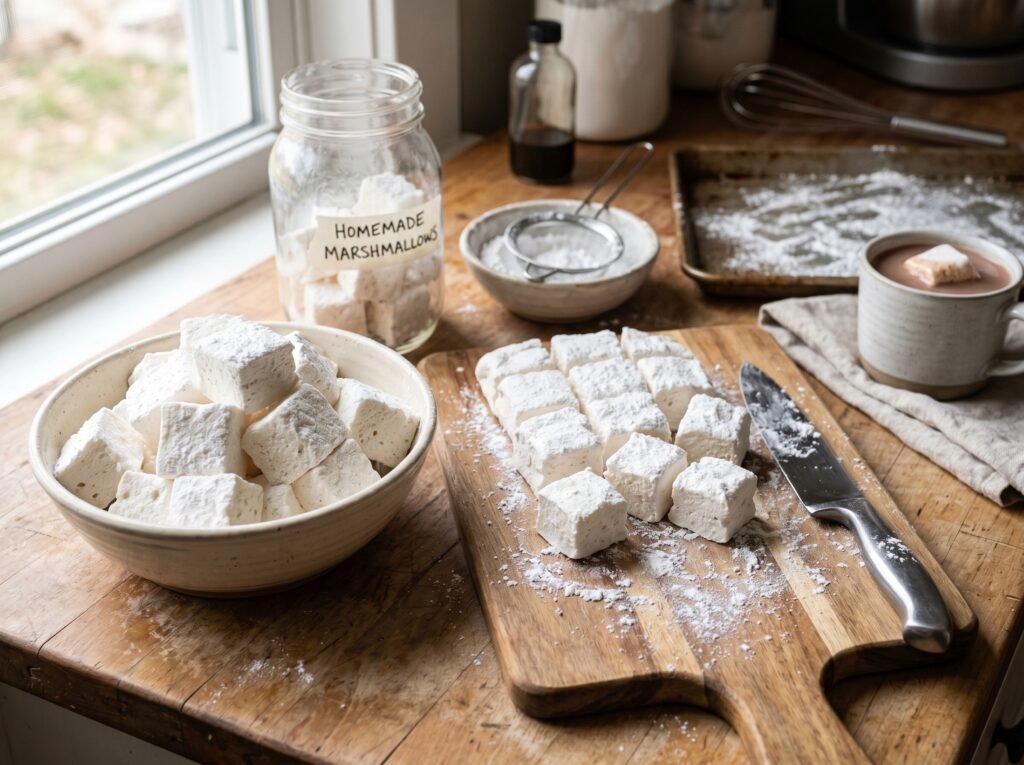
9.The Hot-Knife Cube Slit Dusting:10 min.
Dust your clean cutting board with the remaining sugar-starch powder. Invert the marshmallow pan onto the board, tapping the bottom until the slab slides out cleanly. Dust a long, sharp chef’s knife with powder (or wipe it with a damp hot towel). Slice the slab into 1-inch strips, then cut crosswise into perfect square cubes. Toss each sticky marshmallow cube into the remaining powder mix until completely coated, then shake off the excess in a colander.
Expert Tips for Success
- The No-Stir Candy Thermometer Rule: When boiling your sugar syrup up to the critical $115^\circ\text{C}$ ($240^\circ\text{F}$) threshold, resist the urge to stir the liquid with a spoon once it starts bubbling. Stirring forces the hot sugar molecules up onto the cold walls of the pan, causing them to recrystallize into hard, jagged grains that will slide back into the syrup and turn your final marshmallows gritty instead of smooth and stretchy.
- Grease Your Tools with Oil: Marshmallow fluff is incredibly sticky and can easily turn into an unmanageable mess. Before you attempt to scrape the whipped foam out of the mixer bowl, coat your rubber spatula, your hands, and even your cutting knife with a very light film of neutral flavorless vegetable oil or cooking spray. The oil creates a slick barrier that allows the foam to slide cleanly without sticking.
- Calibrate for the Perfect Melt: If your marshmallows turn out rubbery or difficult to chew, you likely over-measured your gelatin or over-boiled your sugar syrup. For a true melt-in-your-mouth texture, always level off your gelatin tablespoons precisely and ensure your candy thermometer is fully submerged in the boiling liquid without touching the hot metal bottom of the saucepan.
The Recipe Card
- Prep Time: 20 mins (plus 6 hours curing time)
- Cook Time: 12 mins
- Whip Time: 12 mins
- Total Time: 44 mins (excluding curing)
- Yield: Approx. 36 Generous Pillow-Soft Cubes
Ingredients:
- The Fluffy Marshmallow Foam: 3 envelopes (approx. 21g or 2 ½ tbsp) Unflavored Powdered Gelatin, 240ml (1 cup) Cold Water (divided into two equal ½ cup portions), 400g (2 cups) Granulated White Sugar, 160ml (⅔ cup) Light Corn Syrup, ¼ tsp Fine Sea Salt, 1 tbsp Pure Vanilla Extract.
- The Non-Stick Coating Dust: 60g (½ cup) Powdered Icing Sugar, 60g (½ cup) Cornstarch, Neutral cooking spray (for greasing).
Instructions:
Grease an 8×8-inch square metal baking pan with cooking spray. Whisk the powdered sugar and cornstarch together, then dust the inside of the pan heavily to coat, tapping out the excess into a bowl; set aside. In your stand mixer bowl, combine ½ cup of cold water and sprinkle the gelatin evenly over the top; let bloom for 10 minutes. In a heavy saucepan, combine the granulated white sugar, light corn syrup, salt, and the remaining ½ cup of water. Place over medium-high heat with a candy thermometer attached. Bring to a boil, stirring only until the sugar dissolves. Once boiling, do not stir, and cook until the syrup reaches exactly 115°C (240°F). Turn your mixer to low and slowly stream the hot sugar syrup down the side of the bowl into the bloomed gelatin. Gradually increase the speed to high and whip for 10-12 minutes until thick, glossy, white, and tripled in volume. Add the vanilla extract in the last 30 seconds. Quickly scrape the foam into the prepared pan with a greased spatula, smooth the top, and dust with a layer of the sugar-starch powder. Let sit uncovered at room temperature for at least 6 hours to set. Invert onto a dusted board, slice into squares using a sharp dusted knife, and toss the cubes in the remaining powder to coat. Store in an airtight container for up to 3 weeks.
