

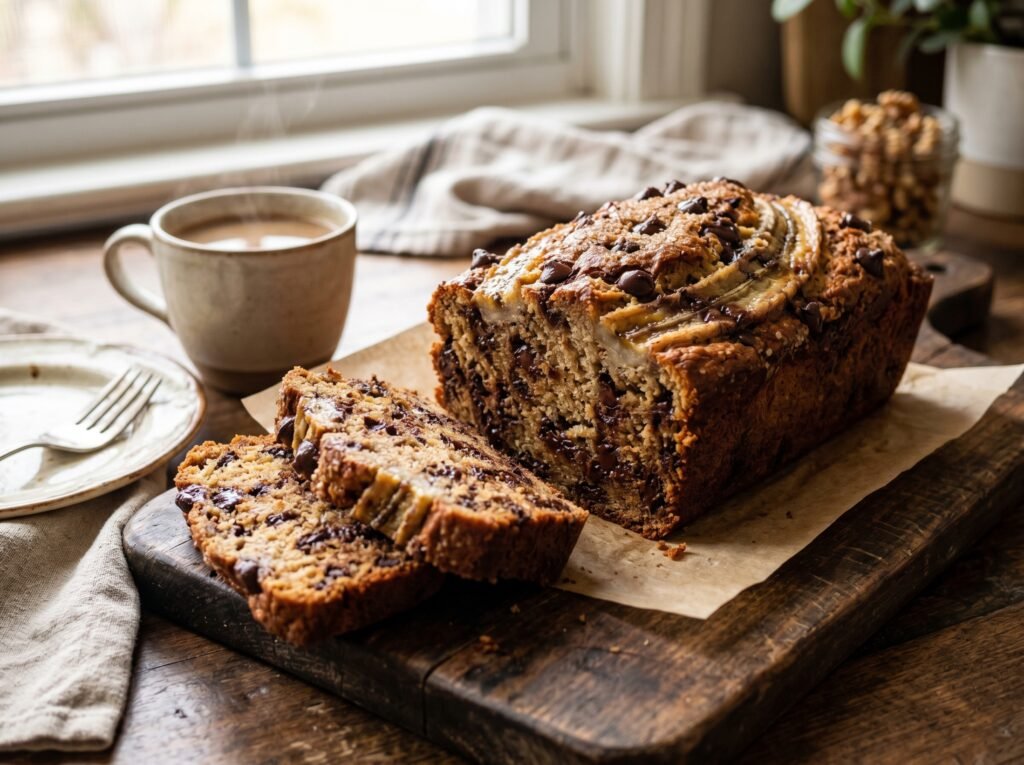
A truly magnificent banana bread shouldn’t just be an ordinary cake shaped like a loaf. It should be a deeply caramelized, heavy, dense masterpiece that is intensely soft, fragrant, and crowded with pockets of molten chocolate. Break open a thick slice, and the interior crumb should feel almost fudgy, packed with moisture, while the outside sports a dark, sticky, sugar-crusted armor. If your homemade banana loaves consistently turn out dry, pale, crumbly, or have a dense, rubbery glue-streak running along the very bottom, it comes down to banana chemistry and fat emulsion.
The primary structural hurdle with banana bread is managing the massive volume of liquid and natural sugars that bananas introduce without turning the crumb gummy. Bananas are highly variable; their moisture content shifts drastically as they ripen and their starches convert to sugar. To guarantee a high-rise loaf that stays intensely moist for days without turning wet or heavy, we employ the Dual-Sugar Emulsion strategy. By pairing highly hydroscopic (moisture-retaining) dark brown sugar with a precise blend of melted butter for rich flavor and vegetable oil for structural elasticity, we wrap the flour particles in an airtight fat blanket. This keeps the cake crumb incredibly tender while giving the leavening agents enough stable traction to lift the heavy batter into a beautiful dome.
Why You’ll Love This Method
- Intensely Moist for Days: The smart union of brown sugar and vegetable oil locks free moisture in place, preventing the loaf from drying out or staling even three days after baking.
- No Blender or Mixer Needed: This is a classic “two-bowl quick bread.” Over-beating with an electric mixer introduces too much air, whereas a simple hand-whisk keeps the batter perfectly dense.
- Deeply Caramelized Flavor Profile: Using melted butter allows the milk solids to toast slightly during the bake, producing a warm, nutty undertone that pairs beautifully with the rich brown sugar.
- Chocolate in Every Single Bite: A clever technique of dusting the chocolate chips in a spoonful of flour prevents them from sinking into a solid, scorched layer at the bottom of the pan.
Key Ingredients Overview
- Overripe, Black-Spotted Bananas: Do not use firm, yellow bananas here. You need bananas whose skins are heavily speckled with black dots, or completely dark. At this stage, the starches have completely converted into liquid fructose, yielding intense banana aroma and natural moisture.
- Dark Brown Sugar: Brown sugar contains natural molasses, which introduces a rich caramel undertone and provides the necessary acidity to activate the baking soda, ensuring a beautiful, uniform rise.
- The Fat Double-Act (Butter + Oil): Melted butter delivers that irreplaceable, comforting bakery aroma, while a splash of neutral vegetable oil keeps the crumb bouncy and moist even when eaten cold from the fridge.
- Semi-Sweet or Dark Chocolate Chips: Avoid milk chocolate, which turns cloyingly sweet when paired with ripe bananas. Large semi-sweet chocolate chunks or chips provide a sharp, bitter-sweet contrast that balances the loaf flawlessly.
Step-by-Step Instructions
1.The Moderate Oven Target:2 min.
Preheat your oven to 175°C (350°F). Line a standard 8.5 x 4.5 inch metal loaf pan with a sheet of parchment paper, leaving a 2-inch overhang on the sides to act as a handy sling later.
2.The Black Banana Deep Mash:4 min.
Peel your overripe bananas and place them into a wide bowl. Using the prongs of a heavy fork or a potato masher, smash them aggressively until they form a smooth, liquid puree with just a few tiny, pea-sized chunks remaining.
3.The Warm Caramel Liquid Emulsion:3 min.
In a medium bowl, whisk together your melted unsalted butter, vegetable oil, dark brown sugar, and granulated white sugar until no clumps remain. Whisk in the room-temperature eggs one at a time, followed by the mashed bananas and vanilla extract. Whisk vigorously until the wet base is completely unified.
4.The Dry Flour Aeration and Chip Coat:3 min.
In a separate large bowl, whisk together the all-purpose flour, baking soda, and fine sea salt. Toss your chocolate chips into this dry mixture, stirring until every single chip is lightly dusted with flour. This flour coating acts like velcro, keeping the chips suspended uniformly throughout the heavy batter.
5.The Gentle Hand-Fold Fold:2 min.
Pour the wet liquid ingredients directly into the dry flour bowl. Using a flexible rubber spatula, gently fold the two mixtures together just until the white flour streaks disappear (roughly 10 to 12 folds). Stop mixing instantly once combined—the batter should look thick, heavy, and lumpy.
6.The Loaf Pan Load and Crown Scatter:2 min.
Scrape the heavy batter into your prepared loaf pan, smoothing the top surface with your spatula. Scatter an extra handful of clean chocolate chips across the top of the raw batter; this creates a beautiful, picture-perfect bakery appearance once baked.
7.The Low and Slow Loaf Roasting:60 min.
Bake at 175°C (350°F) for 55 to 65 minutes. Do not open the oven door during the first 45 minutes. The bread is done when a long wooden skewer inserted deep into the absolute center of the loaf comes out clean, or with a few moist crumbs (disregard any streaks of melted chocolate from the chips).
8.The Sling Release Counter Rest:20 min.
Remove the pan from the oven and let it sit on a wire rack for 10 minutes. Using the parchment paper sling handles, gently lift the hot loaf out of the metal pan and leave it on the wire rack to cool completely before slicing. Slicing too early while steaming hot will cause the dense crumb to tear.
Expert Tips for Success
- Never Overmix the Quick Bread: The absolute number one cause of a dense, rubbery banana bread with a heavy “glue streak” at the bottom is overmixing. When flour meets liquid, gluten begins to form. If you mix too much, you build a tough, tight web that traps steam, turning your cake into a rubbery brick. Mix with a gentle hand just until the dry flour is damp.
- Use a Metal Pan if Possible: Glass or ceramic loaf pans conduct heat much slower than aluminum or steel pans. If you use glass, the outer edges of your bread will often get overcooked and dry before the dense, heavy center can cook completely to its core.
- The Quick Banana Ripening Trick: If you are craving banana bread but your bananas are still bright yellow, place them unpeeled on a baking sheet and bake them at 150°C (300°F) for 15 to 20 minutes until the skins turn completely pitch black. Let them cool, split them open, and you’ll find sweet, warm, liquid banana pulp ready for mashing.
The Recipe Card
- Prep Time: 15 mins
- Cook Time: 1 hr
- Cooling Time: 20 mins
- Total Time: 1 hr 35 mins
- Yield: 1 Regular Loaf (approx. 8 to 10 Thick Slices)
Ingredients:
- 3 to 4 Large Overripe Bananas (approx. 400g / 1 ¾ cups mashed pulp)
- 75g (⅓ cup) Unsalted Butter (melted and slightly cooled)
- 60ml (¼ cup) Neutral Vegetable or Canola Oil
- 100g (½ cup, packed) Dark or Light Brown Sugar
- 50g (¼ cup) Granulated White Sugar
- 2 Large Eggs (room temperature)
- 1 tsp Pure Vanilla Extract
- 260g (2 cups) All-Purpose Flour
- 1 tsp Baking Soda
- ½ tsp Fine Sea Salt
- 150g (1 cup) Semi-Sweet or Dark Chocolate Chips (plus an extra handful for the top)
Instructions:
Preheat oven to 175°C (350°F) and line an 8.5 x 4.5 inch loaf pan with parchment paper. Mash the bananas completely until liquid. In a bowl, whisk together the melted butter, oil, brown sugar, white sugar, eggs, vanilla, and mashed bananas until thoroughly emulsified. In a separate large bowl, whisk the flour, baking soda, and salt together, then stir in the chocolate chips to coat them. Pour the wet mixture into the dry bowl and fold gently with a spatula just until the flour is incorporated; do not overmix. Pour the heavy batter into the pan, smooth the top, and scatter an extra handful of chocolate chips across the surface. Bake for 55-65 minutes until a skewer inserted into the center comes out clean. Cool in the pan for 10 minutes, then lift out using the parchment sling to cool completely on a wire rack.
