

There is a brilliant baking loophole that completely bypasses the need for all-purpose flour, butter, or rolling pins. The traditional Flourless Peanut Butter Cookie is a minimalist masterpiece that relies on basic food science to create an intensely rich, soft-baked cookie with a melt-in-your-mouth texture. It packs a far more potent, unadulterated peanut punch than any standard cookie because there is no grain flour matrix to dilute the nut flavor.
The primary culinary magic at play here is Emulsion-Driven Oil Binding. Conventional wisdom suggests that a cookie needs flour to provide structural gluten bonds, but a peanut butter jar is already packed with natural plant proteins and heavy fats. When you mix highly oil-soluble peanut butter with a whole egg and crystalline sugar, the egg proteins act as a powerful binding emulsifier. As it bakes, the sugar melts and caramelizes, trapping the peanut oils inside a tight, delicate protein web. This yields a cookie that develops a crisp, paper-thin outer shell while remaining impossibly fudgy and chewy in the dead center.
Why You’ll Love This Sweet Treat
- Incredibly Minimalist: This recipe requires just 3 core ingredients that you likely already have sitting in your pantry right now.
- Naturally Gluten-Free & Dairy-Free: Because it skips the wheat flour and butter entirely, it is a naturally safe and accommodating option for dietary restrictions.
- The Quickest Cookie Fix: The dough takes exactly 3 minutes to mix by hand in a single bowl—no electric mixers, chilling time, or rolling pins needed.
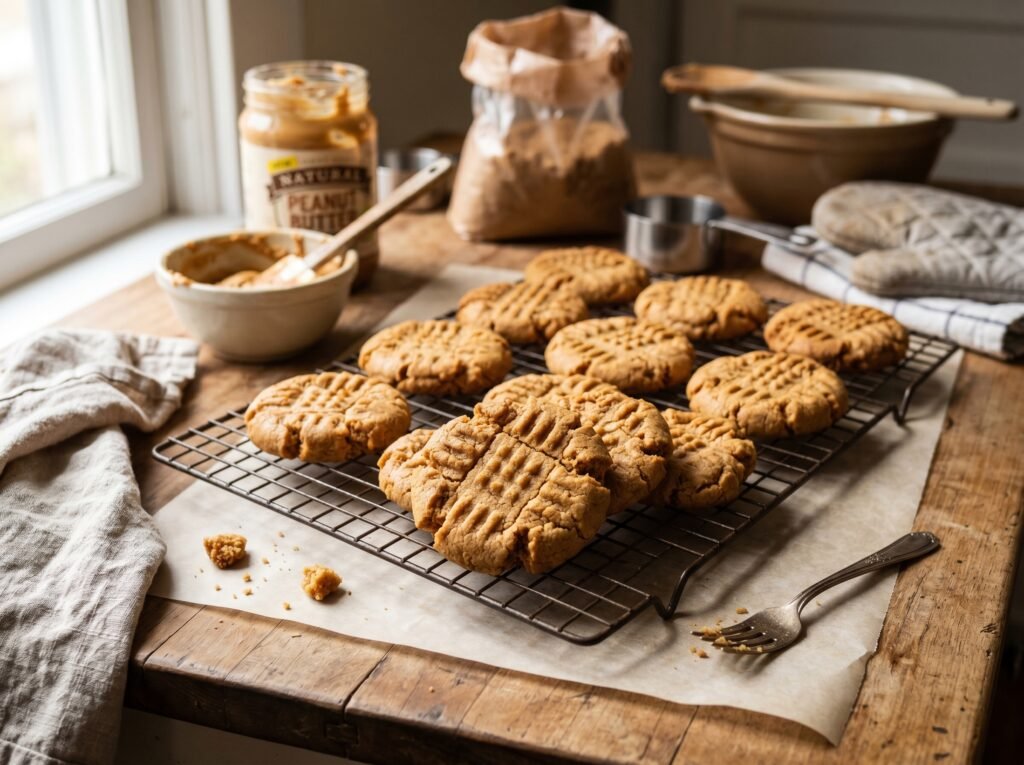
- That Nostalgic Criss-Cross Crunch: Pressing the dough with a fork creates high-ridges that bake up extra-crunchy, contrasting beautifully with the soft center.
Key Ingredients Overview
- Standard Commercial Peanut Butter: For the ultimate success, use a traditional shelf-stable creamy peanut butter (like Skippy or Jif). Note: Avoid “natural” style peanut butters that require stirring; their separated oils will cause the cookie dough to break, puddle, and turn greasy in the oven.
- Granulated White or Light Brown Sugar: Sugar does the heavy structural lifting here. White sugar creates crispier edges, while light brown sugar introduces molasses moisture for a deeper, fudgier chew.
- One Large Egg: The egg provides the vital protein structure and moisture needed to bind the sugary nut paste together so it sets into a cohesive, sliceable cookie.
Step-by-Step Instructions
1.The Steady Oven Target:2 min.
Preheat your oven to 175°C (350°F). Line a large, flat baking sheet with a piece of parchment paper or a silicone baking mat to prevent the sticky dough from sticking.
2.The Single-Bowl Paste Emulsion:3 min.
In a medium mixing bowl, combine your creamy peanut butter, granulated sugar, and the large egg. Using a sturdy wooden spoon or a stiff rubber spatula, stir the ingredients together vigorously. At first, it will look loose, but within 60 seconds the mixture will suddenly stiffen up into a shiny, cohesive, and scoopable dough ball.
3.The Uniform Ball Portioning:3 min.
Using a cookie scoop or a rounded tablespoon, portion the dough into 12 equal-sized balls (roughly the size of a golf ball). Roll each portion between your palms until smooth, and arrange them on your prepared baking sheet, leaving about 2 inches of space between each ball.
4.The Nostalgic Criss-Cross Press:2 min.
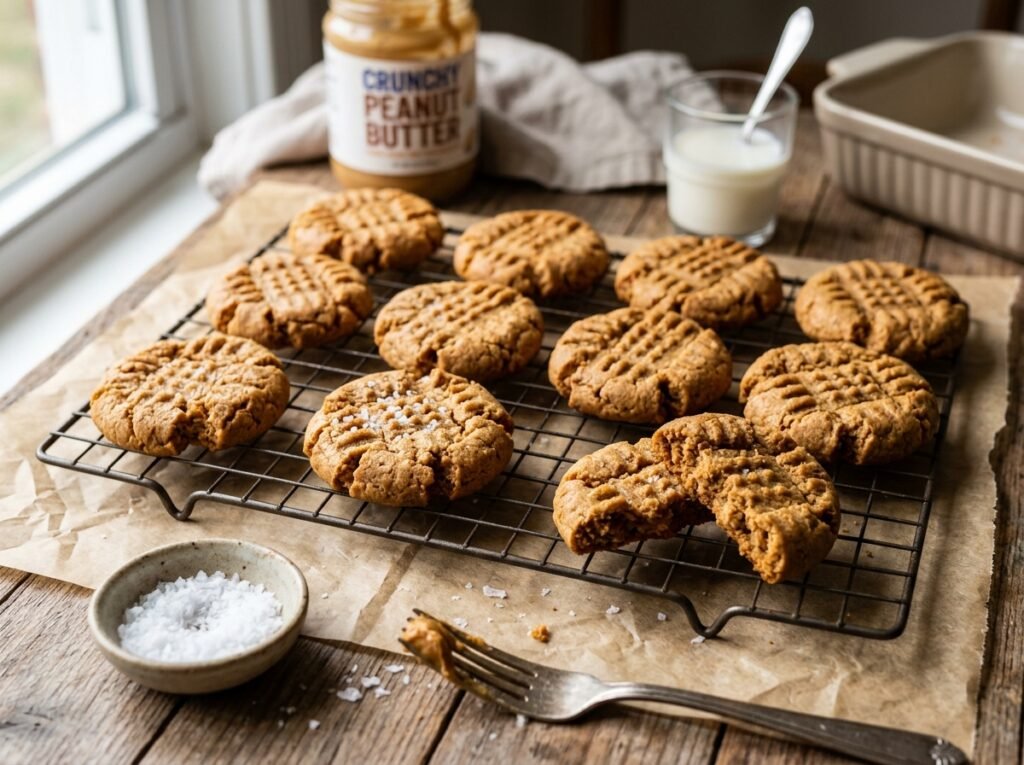
Dip the prongs of a dinner fork lightly into a tiny bowl of extra sugar (this prevents sticking). Press the fork firmly down into the top of a dough ball to flatten it slightly. Lift the fork, rotate it 90 degrees, and press down again to create the iconic crosshatch design. Repeat for all 12 cookies.
5.The Quick High-Fragrance Bake:10 min.
Bake at 175°C (350°F) for 9 to 11 minutes. Do not let them turn dark brown; they are done the moment the outer edges look dry and slightly golden, even if the centers still look incredibly soft and damp.
6.The Fragile Counter Cooling Lock:15 min.
Remove the sheet from the oven. The cookies will be exceptionally soft and fragile right now—if you try to pick them up, they will crumble instantly. Let them sit completely undisturbed on the hot baking sheet for 10 minutes to firm up, then transfer them to a wire rack to cool completely.
Expert Tips for Success
- Say No to Stir-Style Natural Peanut Butter: Natural peanut butters that consist purely of peanuts and salt lack the stable hydrogenated vegetable oils found in traditional commercial brands. When baked, that loose natural oil separates completely from the solid nut mass, leaving you with flat, oily discs rather than thick, soft cookies.
- Elevate with Sea Salt Flakes: Because these cookies are intensely rich and sweet, adding a tiny scatter of coarse sea salt flakes across the raw dough right after you press them with the fork cuts through the heavy fat profile, giving them a sophisticated, sweet-and-salty finish.
- Keep an Eye on the Clock: A single minute can make the difference between a fudgy cookie and a dry, crumbly one. Pull them out when the edges feel just barely set. They will finish cooking through to their core on the hot pan as they cool down.
The Recipe Card
- Prep Time: 10 mins
- Cook Time: 10 mins
- Cooling Time: 15 mins
- Total Time: 35 mins
- Yield: 12 Rich, Soft-Baked Cookies
Ingredients:
- 250g (1 cup) Creamy Commercial Peanut Butter (such as Jif or Skippy)
- 200g (1 cup) Granulated White Sugar (or Light Brown Sugar for a chewier core)
- 1 Large Egg (room temperature)
- 1 tsp Pure Vanilla Extract (optional, for aroma)
- Coarse Sea Salt Flakes (optional, for topping)
Instructions:
Preheat your oven to 175°C (350°F) and line a baking sheet with parchment paper. In a medium bowl, vigorously stir together the creamy peanut butter, sugar, egg, and vanilla extract using a wooden spoon until the ingredients emulsify into a thick, cohesive dough ball. Scoop the dough and roll into 12 equal balls, placing them 2 inches apart on the sheet. Dip a fork in extra sugar and press a criss-cross pattern onto each ball, flattening them to about a half-inch thickness. Bake for 9-11 minutes until the edges are lightly golden and set. Let the cookies cool undisturbed on the hot baking sheet for 10 minutes before moving them to a wire rack to cool completely.
